Why Use Laravel Socialite for Google Authentication?
In today's web applications, forcing users to create yet another account with email + password often leads to high drop-off rates during signup. Social authentication changes that by letting users log in with trusted providers like Google — one click, no new passwords to remember.
Laravel Socialite is the official, first-party package that makes this seamless. Here's why developers choose it for Google OAuth (and other providers) in Laravel 11+:
- Minimal Boilerplate Code — Handles complex OAuth flows (redirects, token exchange, user data retrieval) with just a few lines. No need to manually deal with cURL, state validation, or signature generation.
- Fluent & Expressive API — Clean syntax like Socialite::driver('google')->redirect() and Socialite::driver('google')->user() — easy to read and maintain.
- Built-in Support for Major Providers — Google, GitHub, Facebook, LinkedIn, Slack, and more — all configured via config/services.php and .env.
- Secure by Default — Abstracts away common security pitfalls (CSRF state, token validation) while giving you full control over user creation/login logic.
- Stateless Option — Perfect for SPAs or APIs with ->stateless().
- Time-Saving & Reliable — Maintained by the Laravel team, regularly updated, and community-backed — avoids reinventing the wheel or using unmaintained forks.
- Better User Experience & Conversion — Reduces friction → higher registration rates, especially on mobile.
Whether you're building a SaaS, blog, e-commerce site, or dashboard, adding Google Sign-In via Socialite boosts trust (Google's branding), simplifies onboarding, and enhances security (no stored plain passwords for social users).
Table Of Content
1 Prerequisites
2.) Composer
3.) MySQL (or preferred DB)
4.) Google Account (for API Console)
2 Introduction
In this complete Laravel 11 tutorial, we'll walk you through implementing Google Sign-In (OAuth authentication) using two powerful official packages: Laravel Socialite and Laravel Breeze.
Laravel Socialite is the go-to first-party package for handling OAuth authentication with popular social providers. It simplifies the entire flow — redirects, token exchanges, and user data retrieval — with clean, minimal code. While not pre-installed in a fresh Laravel project, adding it takes just one Composer command.
Here are the major providers officially supported by Laravel Socialite:- GitHub
- GitLab
- Bitbucket
- Slack.
This makes it incredibly easy to add multiple social login options to your app in the future.
Laravel Breeze, on the other hand, gives you a modern, lightweight authentication scaffolding (login, registration, dashboard, etc.) built with Blade and Tailwind CSS — the perfect foundation for adding social authentication without unnecessary complexity.
Let's dive deeper into why Socialite is the best choice for this task.
3 Create a Fresh Laravel 11 Project
3.1 Install Laravel Project
Use the following command to install new Laravel Project.
composer create-project laravel/laravel google-login-laravel11
cd google-login-laravel11
3.2 Configure MySql Database
DB_CONNECTION=mysql
DB_HOST=127.0.0.1
DB_PORT=3306
DB_DATABASE=google_login_db
DB_USERNAME=root
DB_PASSWORD=
4 Install Laravel Breeze & Socialite
4.1 Install Breeze Package
composer require laravel/breeze --dev
php artisan breeze:install

php artisan migrate
npm install
npm run dev
4.2 Install Socialite Package
composer require laravel/socialite
5 Set Up Google OAuth Credentials
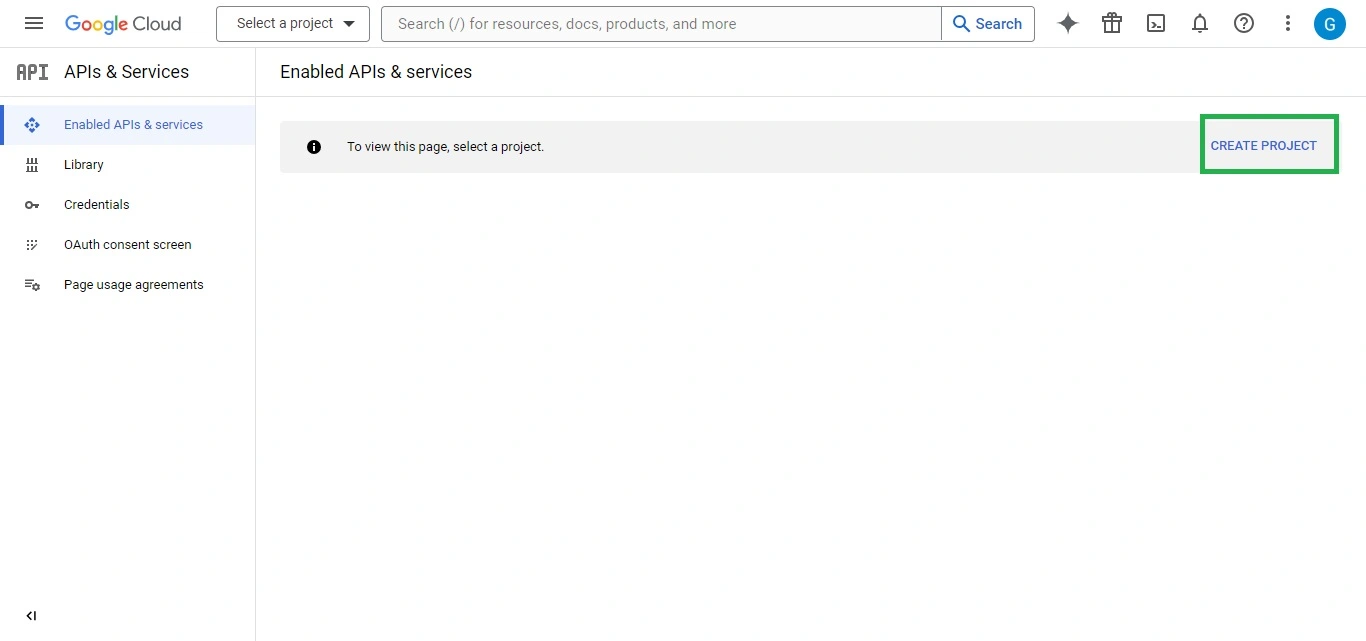
5.1 Login into Google Developer Account
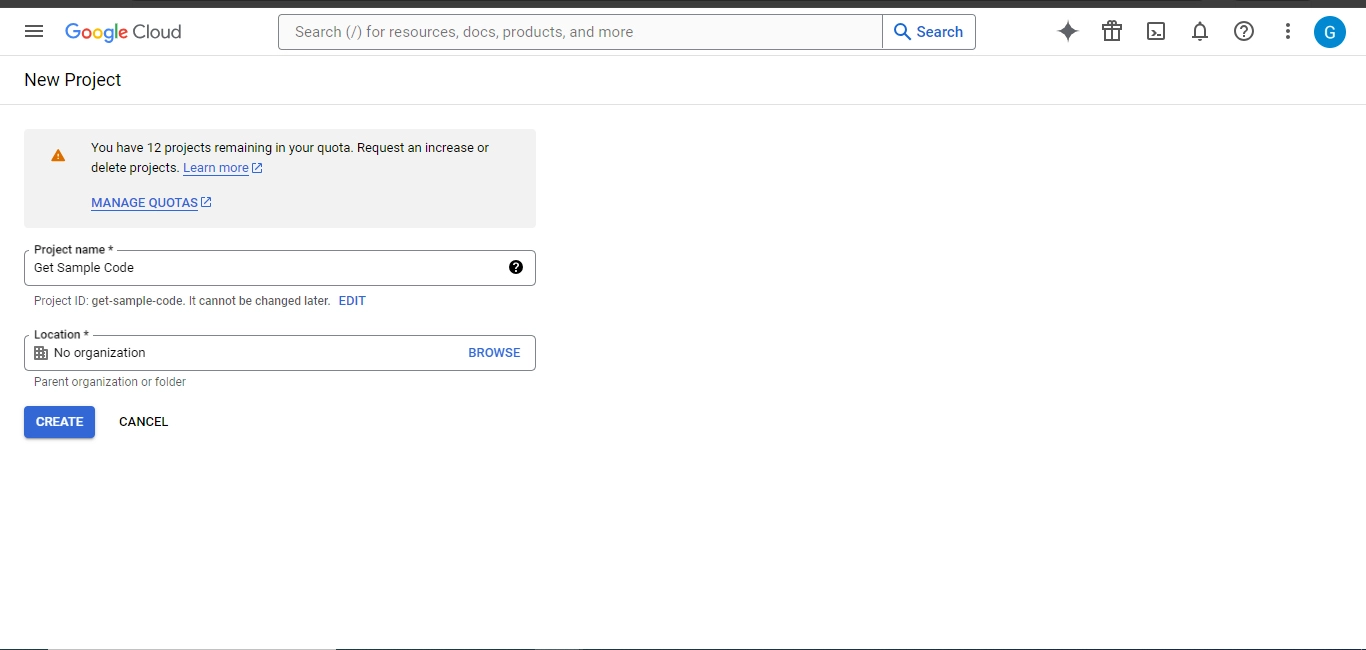
5.2 Create New Project

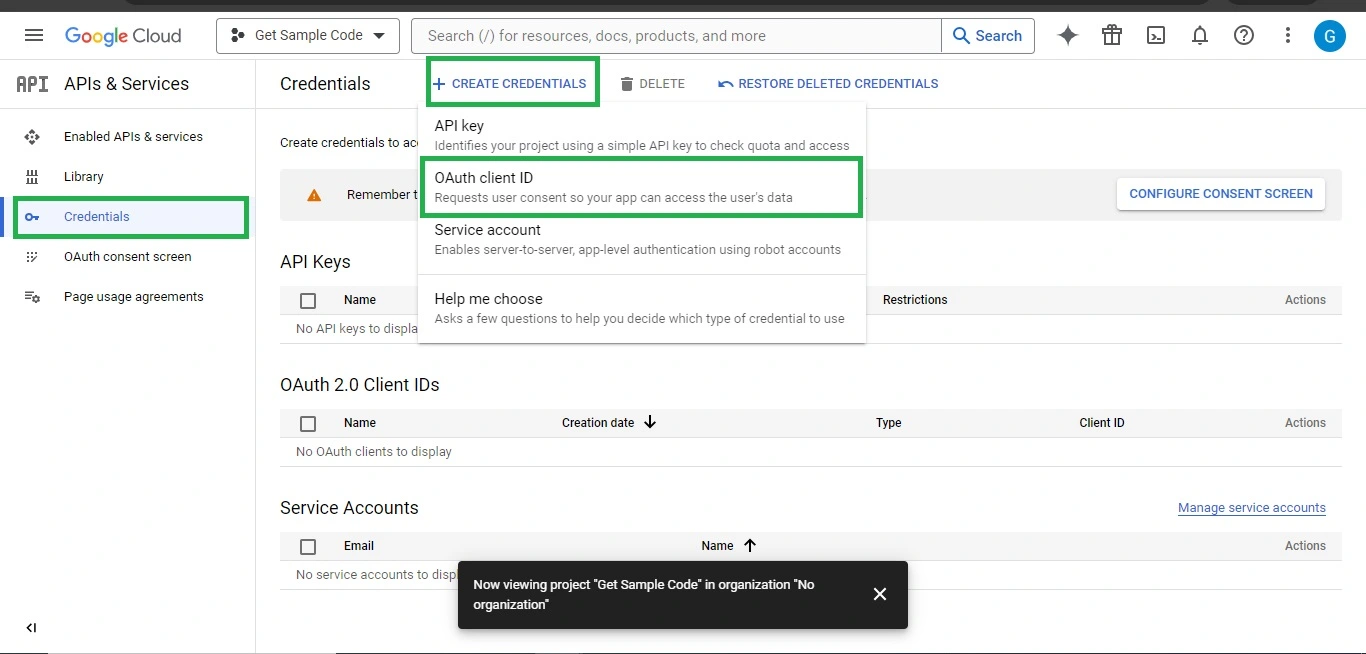
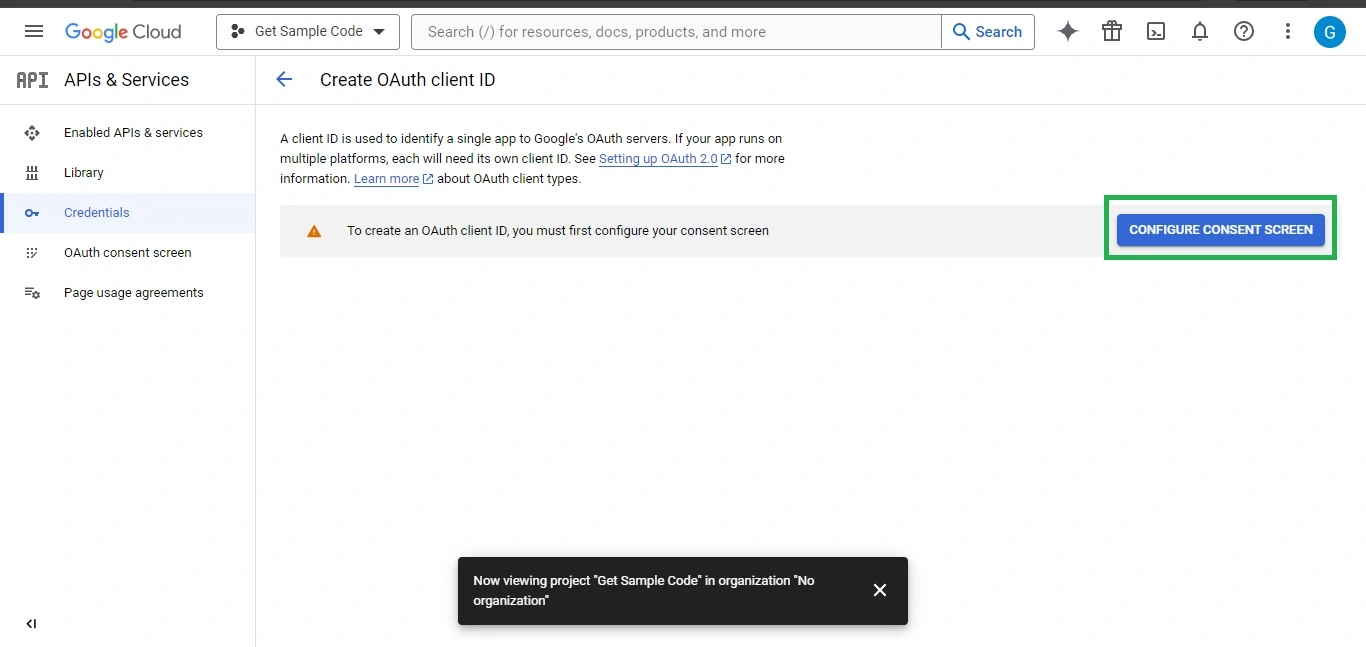
5.3 Create Credentials
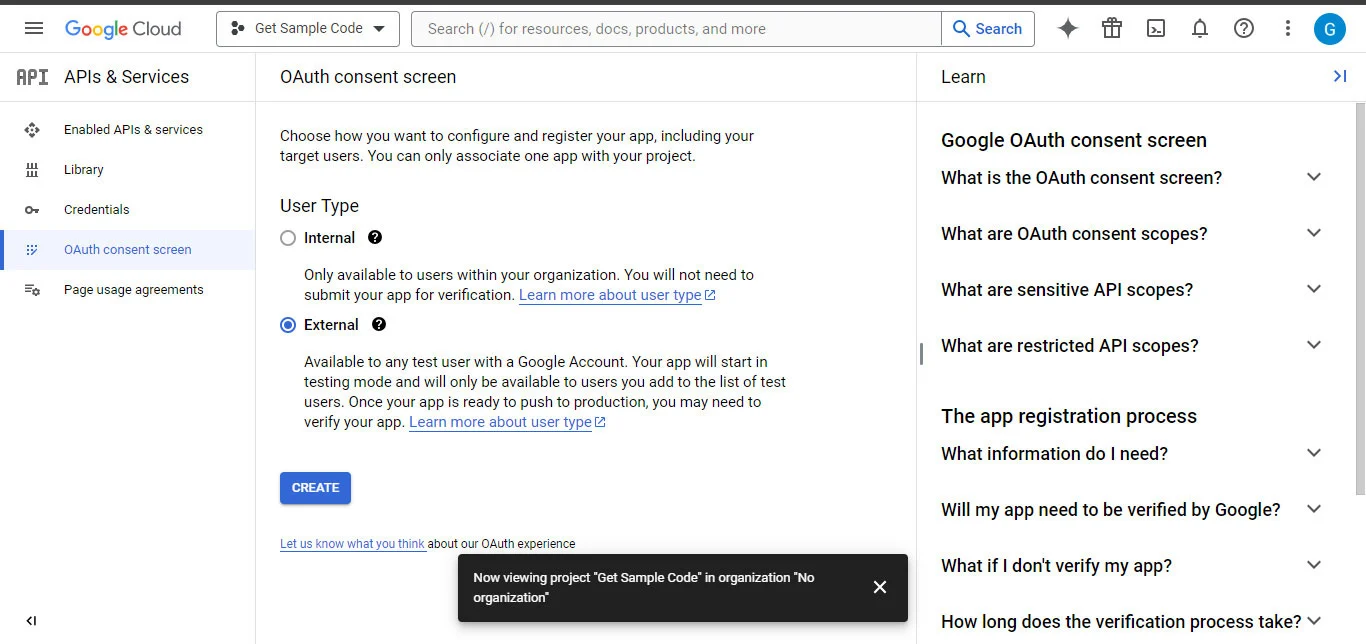
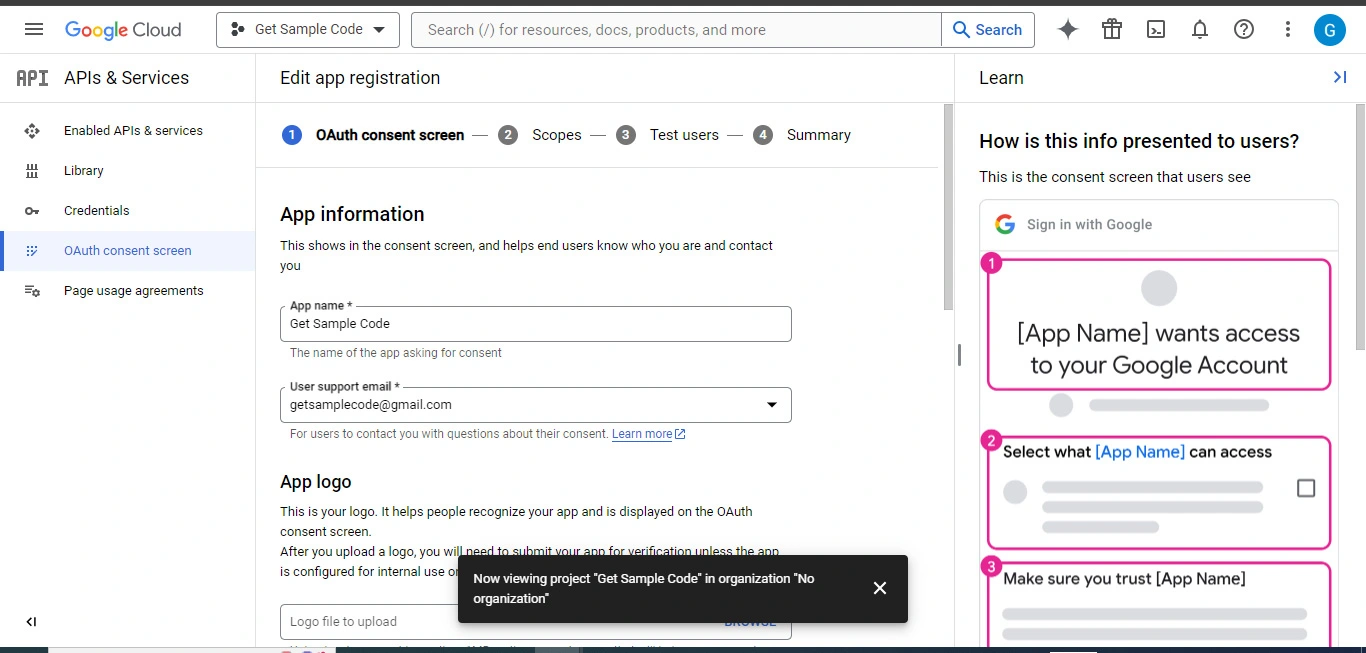
5.4 Configure Consent Screen
5.5 Update App Information
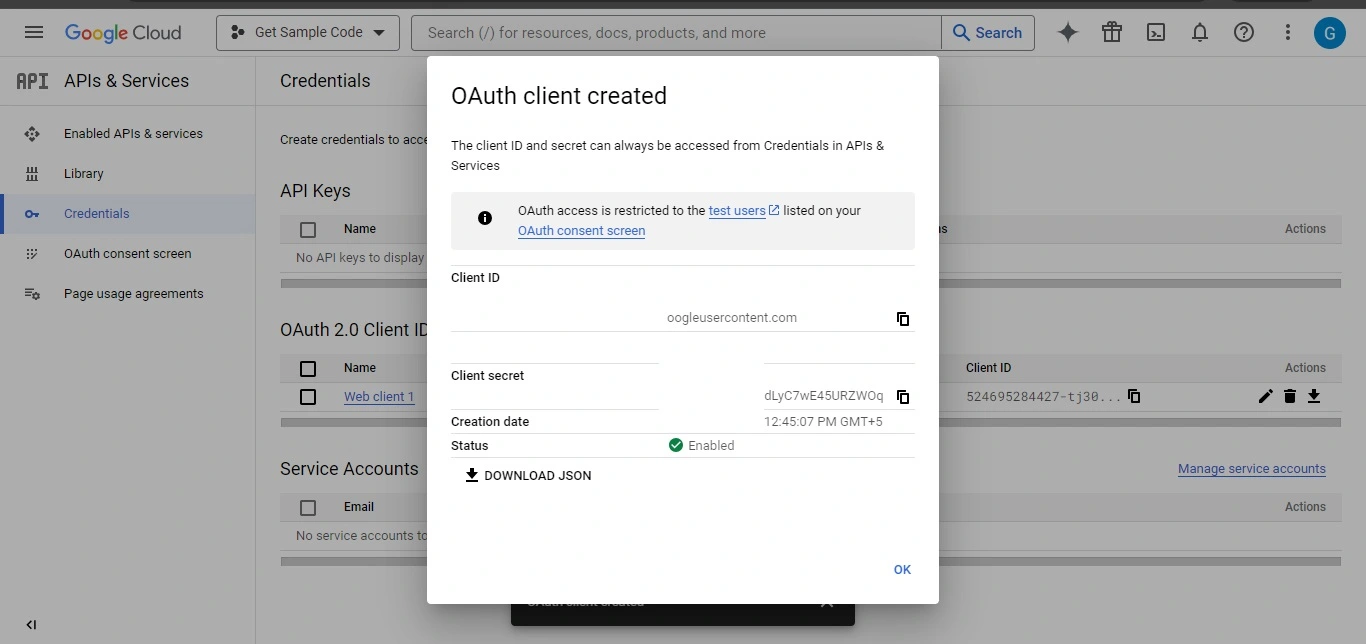
5.6 OAuth Client Created
6 Configure .env and services.php
6.1 Add to .env:
GOOGLE_CLIENT_ID=your-client-id.apps.googleusercontent.com
GOOGLE_CLIENT_SECRET=your-client-secret
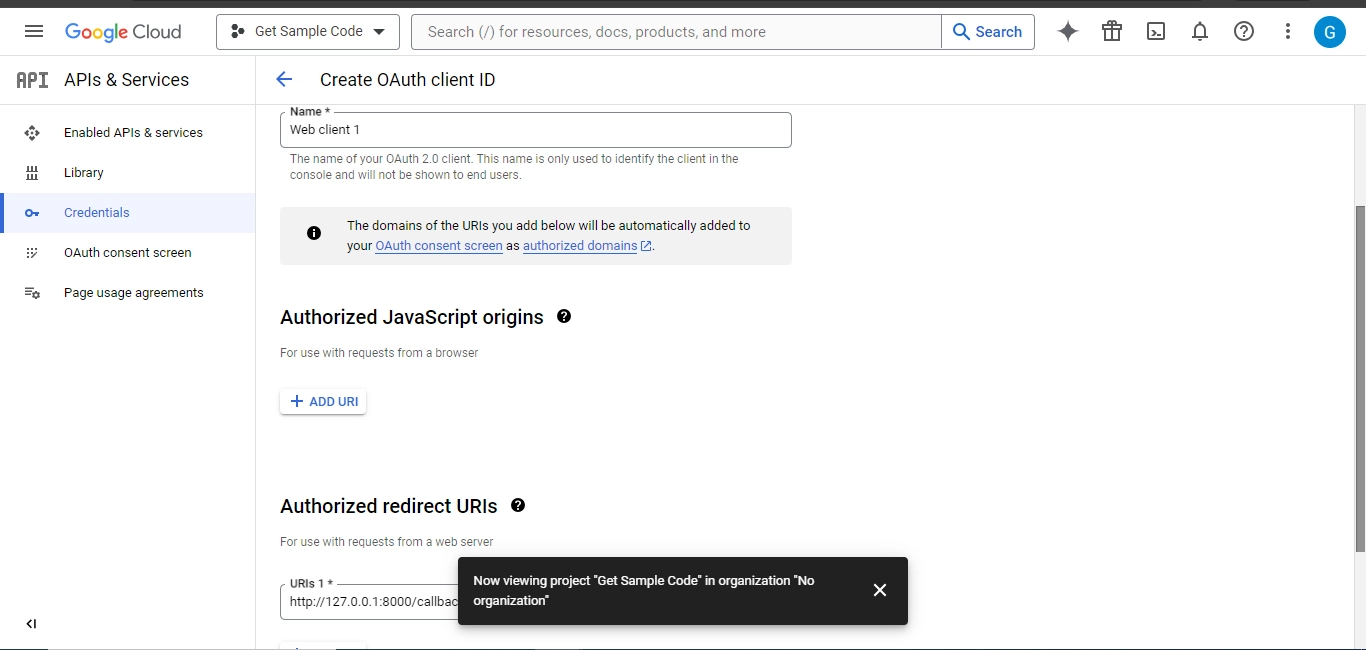
GOOGLE_REDIRECT=http://127.0.0.1:8000/auth/google/callback
6.2 Update config/services.php:
'google' => [
    'client_id'     => env('GOOGLE_CLIENT_ID'),
    'client_secret' => env('GOOGLE_CLIENT_SECRET'),
    'redirect'      => env('GOOGLE_REDIRECT'),
],
6.3 Add google_id Column to Users Table
php artisan make:migration add_google_id_to_users
database/migrations/2024_03_27_110820_add_google_id_to_users.php
<?php

use Illuminate\Database\Migrations\Migration;
use Illuminate\Database\Schema\Blueprint;
use Illuminate\Support\Facades\Schema;

return new class extends Migration
{
    public function up()
    {
        Schema::table('users', function (Blueprint $table) {
            $table->string('google_id')->after('password')->nullable()->unique();
        });
    }

    public function down()
    {
        Schema::table('users', function (Blueprint $table) {
            $table->dropColumn('google_id');
        });
    }
};
php artisan migrate
6.4 Update the User Model
app/Models/User.php
<?php
namespace App\Models;

// use Illuminate\Contracts\Auth\MustVerifyEmail;
use Illuminate\Database\Eloquent\Factories\HasFactory;
use Illuminate\Foundation\Auth\User as Authenticatable;
use Illuminate\Notifications\Notifiable;

class User extends Authenticatable
{
    use HasFactory, Notifiable;

    /**
     * The attributes that are mass assignable.
     *
     * @var array
     */
    protected $fillable = [
        'name',
        'email',
        'password',
        'google_id'
    ];

    /**
     * The attributes that should be hidden for serialization.
     *
     * @var array
     */
    protected $hidden = [
        'password',
        'remember_token',
    ];

    /**
     * Get the attributes that should be cast.
     *
     * @return array
     */
    protected function casts(): array
    {
        return [
            'email_verified_at' => 'datetime',
            'password' => 'hashed',
        ];
    }
}

?>
7 Create Google Auth Controller
php artisan make:controller Auth/GoogleAuthController
<?php
namespace App\Http\Controllers\Auth;

use App\Http\Controllers\Controller;
use App\Models\User;
use Illuminate\Support\Facades\Auth;
use Laravel\Socialite\Facades\Socialite;
use Exception;

class GoogleAuthController extends Controller
{
    public function redirect()
    {
        return Socialite::driver('google')->redirect();
    }

    public function callback()
    {
        try {
            $googleUser = Socialite::driver('google')->user();

            $user = User::where('google_id', $googleUser->id)->first();

            if ($user) {
                Auth::login($user);
            } else {
                $user = User::updateOrCreate(
                    ['email' => $googleUser->email],
                    [
                        'name'      => $googleUser->name,
                        'google_id' => $googleUser->id,
                        'password'  => bcrypt(str()->random(16)), // Secure random placeholder
                    ]
                );
                Auth::login($user);
            }

            return redirect('/dashboard');
        } catch (Exception $e) {
            // In production: log error, show friendly message
            return redirect('/login')->with('error', 'Google login failed. Please try again.');
        }
    }
}
?>
Note: Using updateOrCreate by email prevents duplicates if the same user tries different providers later.
8 Define Routes (routes/web.php)
use App\Http\Controllers\Auth\GoogleAuthController;

Route::get('/auth/google', [GoogleAuthController::class, 'redirect'])->name('google.redirect');
Route::get('/auth/google/callback', [GoogleAuthController::class, 'callback'])->name('google.callback');
9 Add Google Sign-In Button
<div class="mt-6 text-center">
    <a href="{{ route('google.redirect') }}" class="inline-flex items-center px-4 py-2 border border-gray-300 shadow-sm text-sm font-medium rounded-md text-gray-700 bg-white hover:bg-gray-50">
        <img src="https://developers.google.com/identity/images/btn_google_signin_dark_normal_web@2x.png" alt="Sign in with Google" class="h-6 mr-2">
        Sign in with Google
    </a>
</div>
10 Folder Structure
11 Test the Flow
php artisan serve
Visit http://127.0.0.1:8000/login → Click Google button → Authenticate → Redirect to dashboard.
Best Practices & Security Tips (2026 Updates)
- Use HTTPS in production (redirect URI must match).
- Store provider tokens if needed ($googleUser->token, refreshToken).
- Validate email domain for enterprise apps.
- Add rate limiting on auth routes.
- Use stateless() if stateless API (e.g., SPA).
- Never expose real passwords; random is better than fixed placeholder.
- Handle exceptions gracefully (no dd() in production).
Common Issues & Troubleshooting
- Redirect URI mismatch → Double-check Google Console vs .env.
- "invalid_client" → Wrong credentials.
- User not created → Check migration ran, fillable updated.
12 Conclusion

Written by Revathi M
PHP Developer & Technical Writer · 10+ years building web applications with CodeIgniter and Laravel
Revathi specializes in PHP backend development, authentication systems, and REST API design. She writes practical, production-tested tutorials at Get Sample Code to help developers build secure applications faster.
Frequently Asked Questions
You need PHP 8.2 or higher, Composer, a MySQL database, and a Google account to create a developer app.
Run `composer create-project laravel/laravel google-auth-app`, then `cd google-auth-app`.
Install Breeze with `composer require laravel/breeze --dev`, then `php artisan breeze:install`, `php artisan migrate`, `npm install`, and `npm run dev`. Install Socialite with `composer require laravel/socialite`.
Go to https://console.developers.google.com/, create a project, configure the OAuth consent screen (External), create OAuth Client ID (Web application), and set the authorized redirect URI to `http://127.0.0.1:8000/callback/google`.
Add `GOOGLE_CLIENT_ID`, `GOOGLE_CLIENT_SECRET`, and `GOOGLE_REDIRECT_URI=http://127.0.0.1:8000/callback/google` to the `.env` file. Then add the 'google' array to `config/services.php`.
Run `php artisan make:migration add_google_id_to_users`, add `$table->string('google_id')->nullable()->unique();` in the migration, then run `php artisan migrate`. Update the User model's `$fillable` array to include 'google_id'.
Run `php artisan make:controller GoogleSocialiteController`, then implement `redirectToGoogle()` to redirect using Socialite and `handleCallback()` to handle the user response, find or create the user (with a dummy password), and log them in.
In `routes/web.php`, add `Route::get('auth/google', [GoogleSocialiteController::class, 'redirectToGoogle']);` and `Route::get('callback/google', [GoogleSocialiteController::class, 'handleCallback']);`.
In the login view (e.g., from Breeze), add <a href=`{{ url('auth/google') }}`><img src='https://developers.google.com/identity/images/btn_google_signin_dark_normal_web.png'></a> or a similar button linking to `/auth/google`.
The authorized redirect URI in the Google Console must exactly match the `GOOGLE_REDIRECT_URI` in `.env` and the callback route (including http:// and port).
Use the try-catch block with `dd($e->getMessage())` to debug. Common causes: invalid Client ID/Secret, mismatched redirect URI, or issues with the OAuth consent screen.
Since Google login doesn't provide a password, the tutorial uses `bcrypt('my-google')` as a placeholder. In production, consider passwordless strategies or hiding password fields.
The tutorial checks by `google_id`. If found, logs in the existing user; otherwise, creates a new user with name, email, and google_id from the Socialite response.
Run `php artisan serve`, visit `http://127.0.0.1:8000`, go to login, click the Google button, and complete the OAuth flow.